BOOK 28/30Staff & system
Plan, trial & billing
How to sign up a new shop and use the free trial, pick a plan and pay by transfer with a slip, read the payment history, and understand plan locks and limits.
Sign-up and the trial
Sign up a new shop
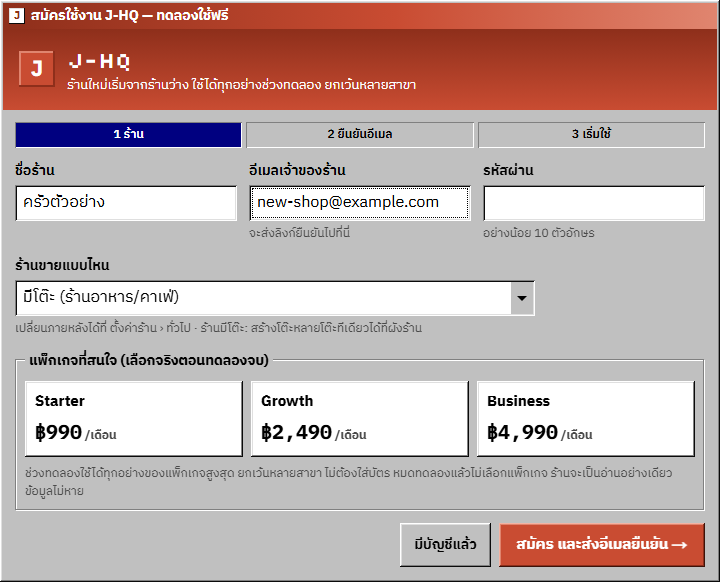
“Sign up for J-HQ — free trial” has 3 steps (Shop · Verify email · Start). Enter the “Shop name” (up to 80 characters), the “Owner's email” and a “Password” (at least 10 characters), then choose “How the shop sells”: With tables (restaurant, café) or Counter (no tables). You can change it later in Shop settings › General.
“The plan you're after (you choose for real when the trial ends)” is only a first pick. Then press “Sign up and send the email →”.
Open full size Verify the email
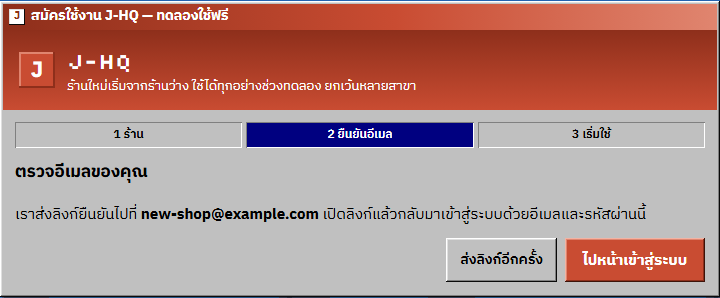
The screen changes to “Check your email”. Open the link in the email, then log in with the email and password you signed up with.
No email? Press “Send the link again” and look in your inbox (and spam), or press “Go to log in” once you have verified.
Open full size The 14-day trial
A new shop starts empty. During the trial everything in the top plan works except multi-branch, and no card is needed.
The taskbar tray shows “Trial: N days left” (hidden on narrow screens). Pick a plan on the plan and payments page before it ends.
Open full size
Picking a plan and paying
Open “Plan and payments”
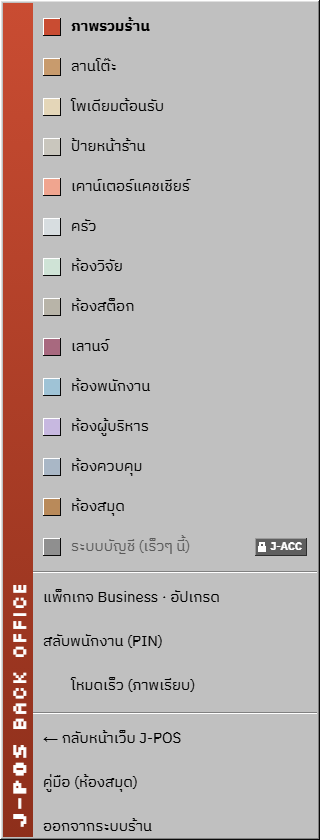
Menu › “<tier> plan · Upgrade”, or press the chip in the taskbar tray. Only the shop owner or someone allowed to change shop settings can open it.
The top line gives the shop's state, for example the trial days left (pick a plan before it ends; no data is lost) or the paid plan and its end date.
Open full size Pick a plan and a billing period
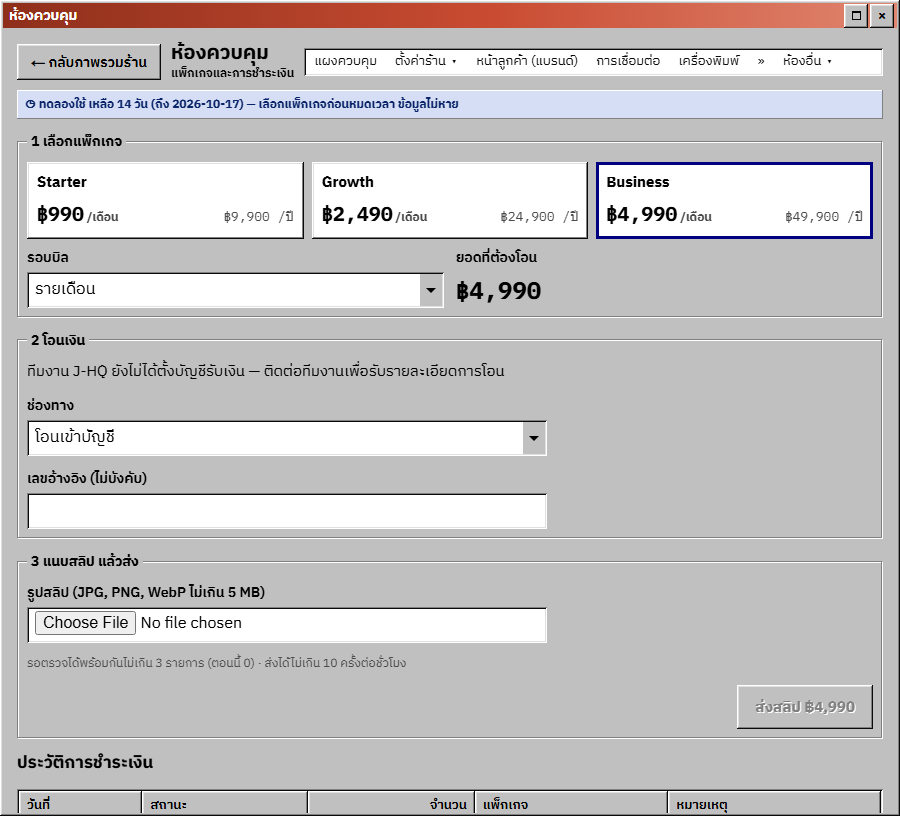
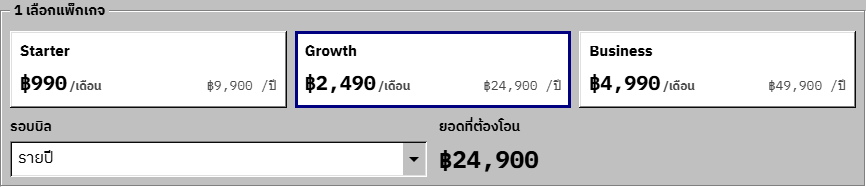
“1 Pick a plan”: each plan card shows the monthly and the yearly price (the plan in use is marked “(current)”). Choose the “Billing period”, Monthly or Yearly, and check the “Amount to transfer”.
Plan names and prices are set by the J-HQ team; the screen shows what applies to your shop.
Open full size Transfer the money
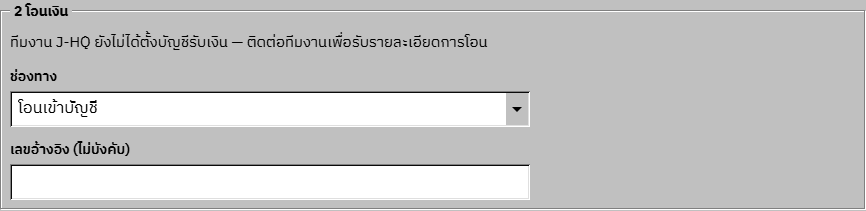
“2 Transfer the money”: pick the “Method”, Bank transfer or PromptPay. PromptPay shows a QR for the exact amount; Bank transfer shows the bank, account number and account name. You can add a “Reference (optional)”.
If it says J-HQ hasn't set its payee details yet, contact the J-HQ team for the transfer details.
Open full size Attach the slip and send
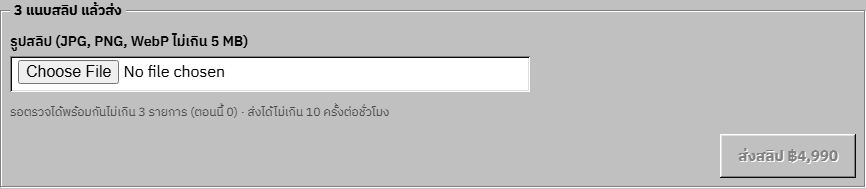
“3 Attach the slip and send”: add the “Slip image (JPG, PNG, WebP, up to 5 MB)” and press “Send the slip”. You then see that the J-HQ team checks the slip and opens the plan (usually within a working day).
At most 3 slips can wait for review at once, and you can send at most 10 times an hour.
Open full size Payment history
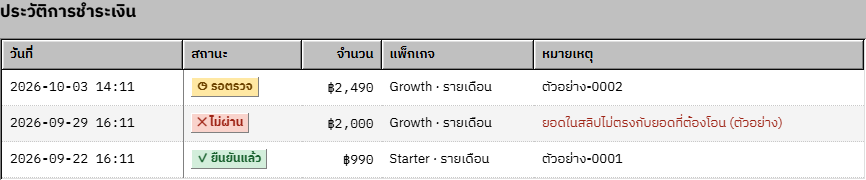
The “Payment history” table has Date · Status · Amount · Plan · Note. The status is “◷ Waiting for review”, “✓ Confirmed” or “✕ Rejected” (the reason for a rejection is in the Note).
Open full size
Plan locks and limits
Features outside the plan
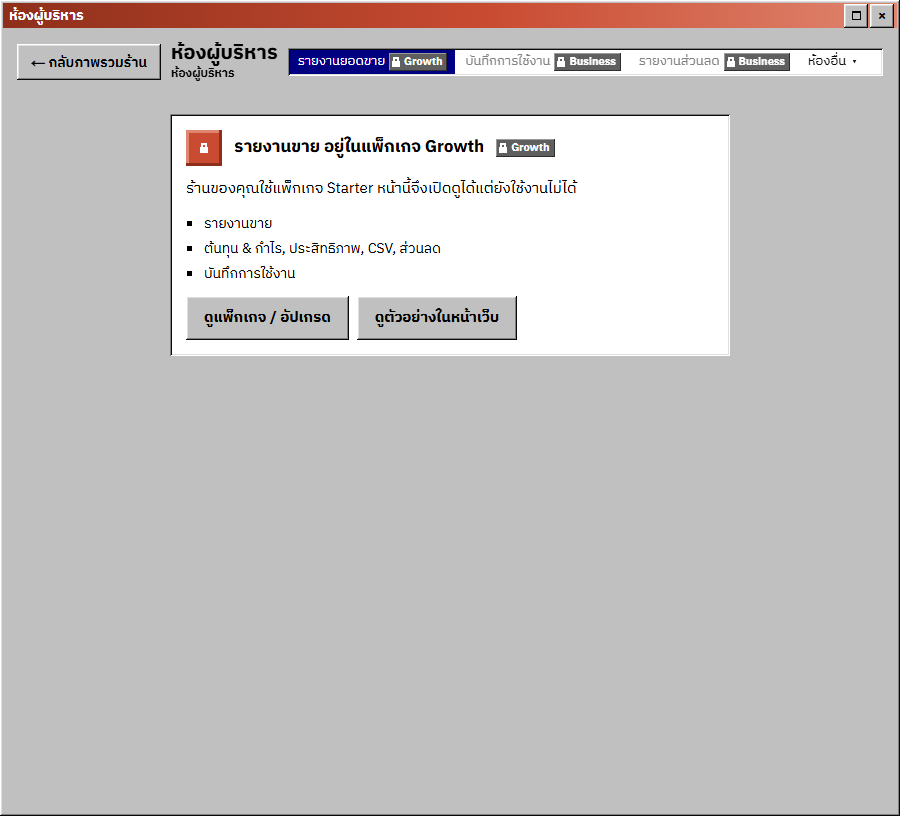
Tabs, menu entries and search results for features the shop's plan doesn't include carry a padlock badge with the name of the plan that has them. The screen still opens and explains which plan it comes with, with “See plans / upgrade” (to the plan page) and “See it on the site”.
Pressing a button the plan doesn't allow opens an “In a higher plan” window.
Open full size Reaching a plan limit
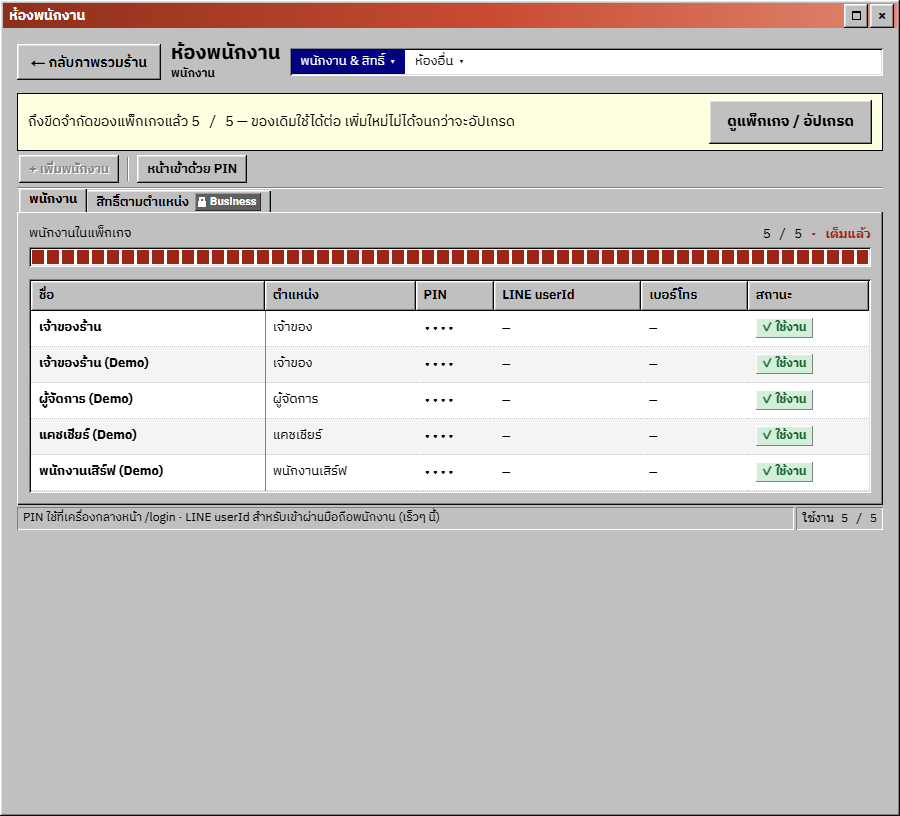
Each plan has maximums, such as staff, tables, members and picture storage. Adding beyond one opens “Plan limit reached” with how many are used against the limit.
The limit is checked only when something new is added: what exists keeps working, and moving to a lower plan deletes nothing. Monthly counters (such as slip checks) restart each calendar month, Thai time.
Open full size
Common points of confusion
Trial over and no plan chosen: read-only, no data lost
Every window shows a bar saying the shop is read-only because the 14-day trial has ended and all data is kept, with a “Choose a plan” button. You can view and export, but not change anything until you pay. The plan and payments page keeps working.
A plan granted by the team
If the J-HQ team set a plan for the shop, you see “◈ <tier> · Granted by the team · until <date>”. It isn't a paid plan; if paid time is queued after it, the line adds that your paid plan follows until its end date.
A slip may be confirmed automatically, but never rejected automatically
The system confirms on its own only a genuine slip with the right amount and receiver, under 48 hours old, whose reference was never used. Anything else stays “Waiting for review” for the team; nothing is rejected automatically.
A “Contact sales” plan can't take a slip
A plan with no price on screen shows “Contact sales”, and the send button says “This plan is contact-sales”. Contact the team directly.
A paused shop
If you see “✕ The shop is paused. Contact the J-HQ team.”, all data is still kept; contact the team to reopen it.