BOOK 17/25Customers & promotions
Bottle keep
Take a customer's bottle on deposit at the register, recording a photo, fill level, and expiry date. Customers can view their own bottles and self-request a withdrawal OTP through LINE, while staff/admins see the whole-shop overview and can extend, transfer, or withdraw a bottle on a customer's behalf from the "Bottle Keep (overview)" menu.
Depositing a bottle at the register (staff, POS screen)
Open the POS screen and press "Bottle keep"
On the main POS screen, press the 🍾 "Bottle keep" button to open the new-deposit dialog — no bill or table needs to be open first.
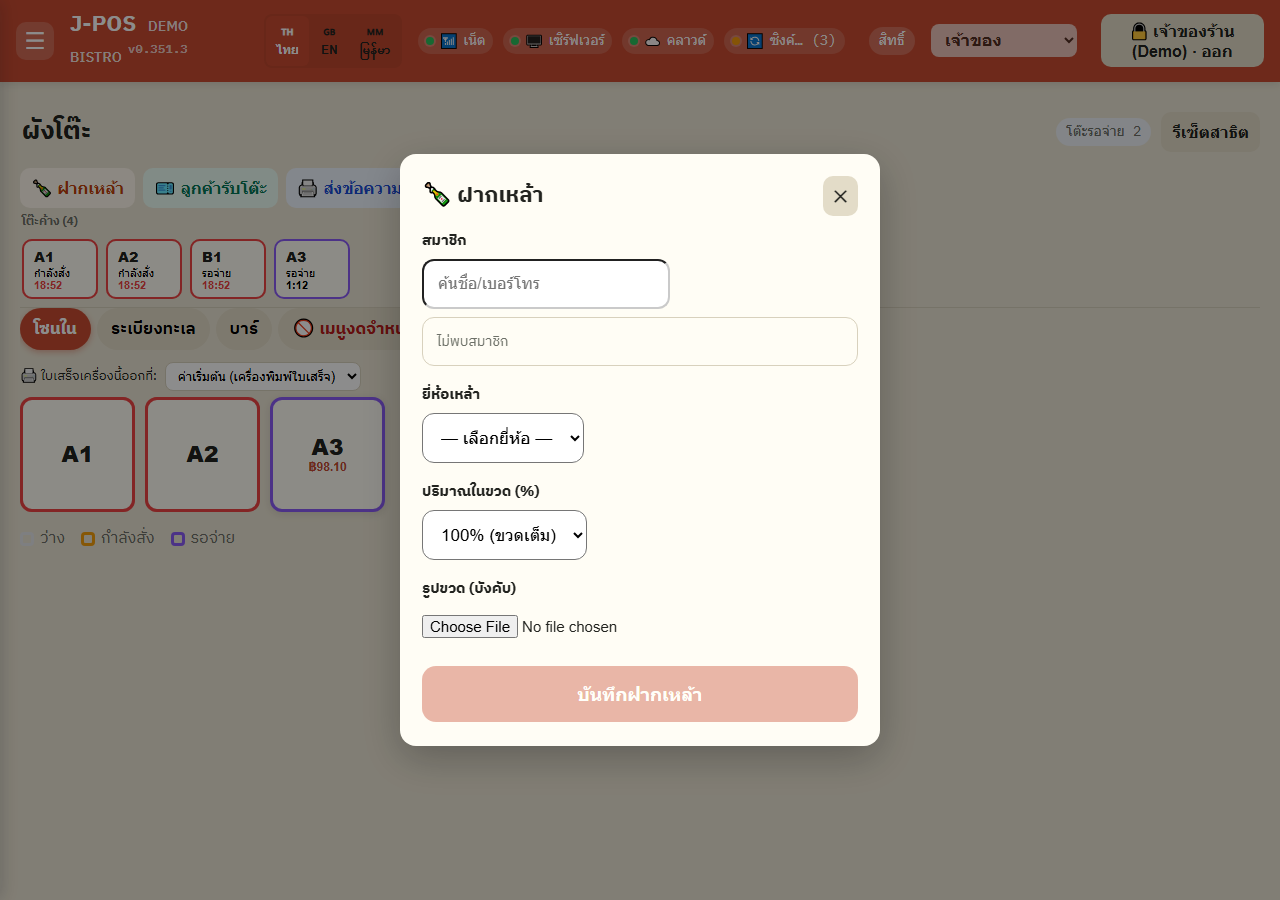
Open full size Search and select the bottle's owner
Type a name or phone number in the search box and tap a member from the results — the member must already exist in the system; you can't deposit a bottle for someone who isn't a member yet.
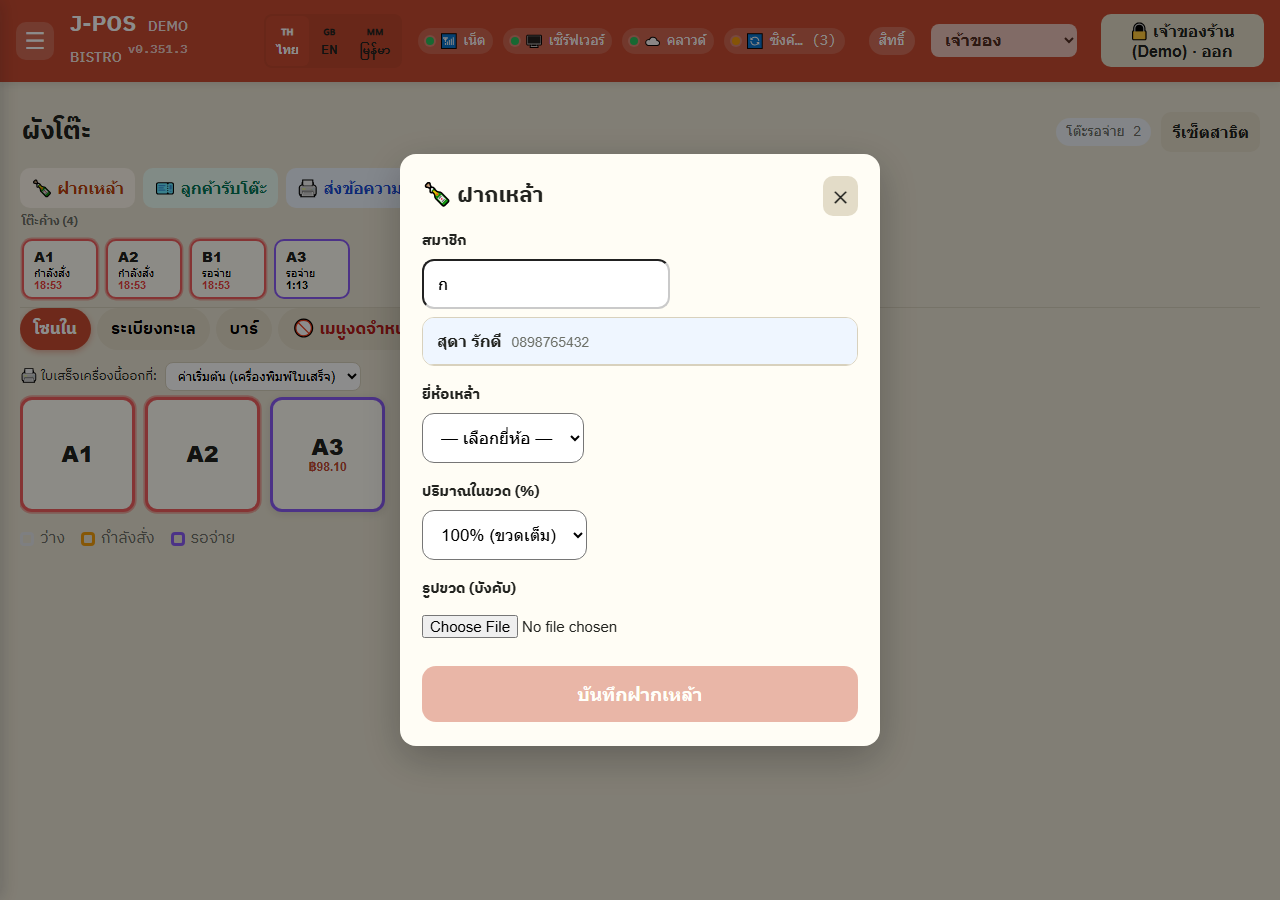
Open full size Choose a liquor brand, or type a custom one
Pick a brand from the shop's pre-configured list (editable in Settings), or choose "Other (type)" and type the name if it isn't on the list.
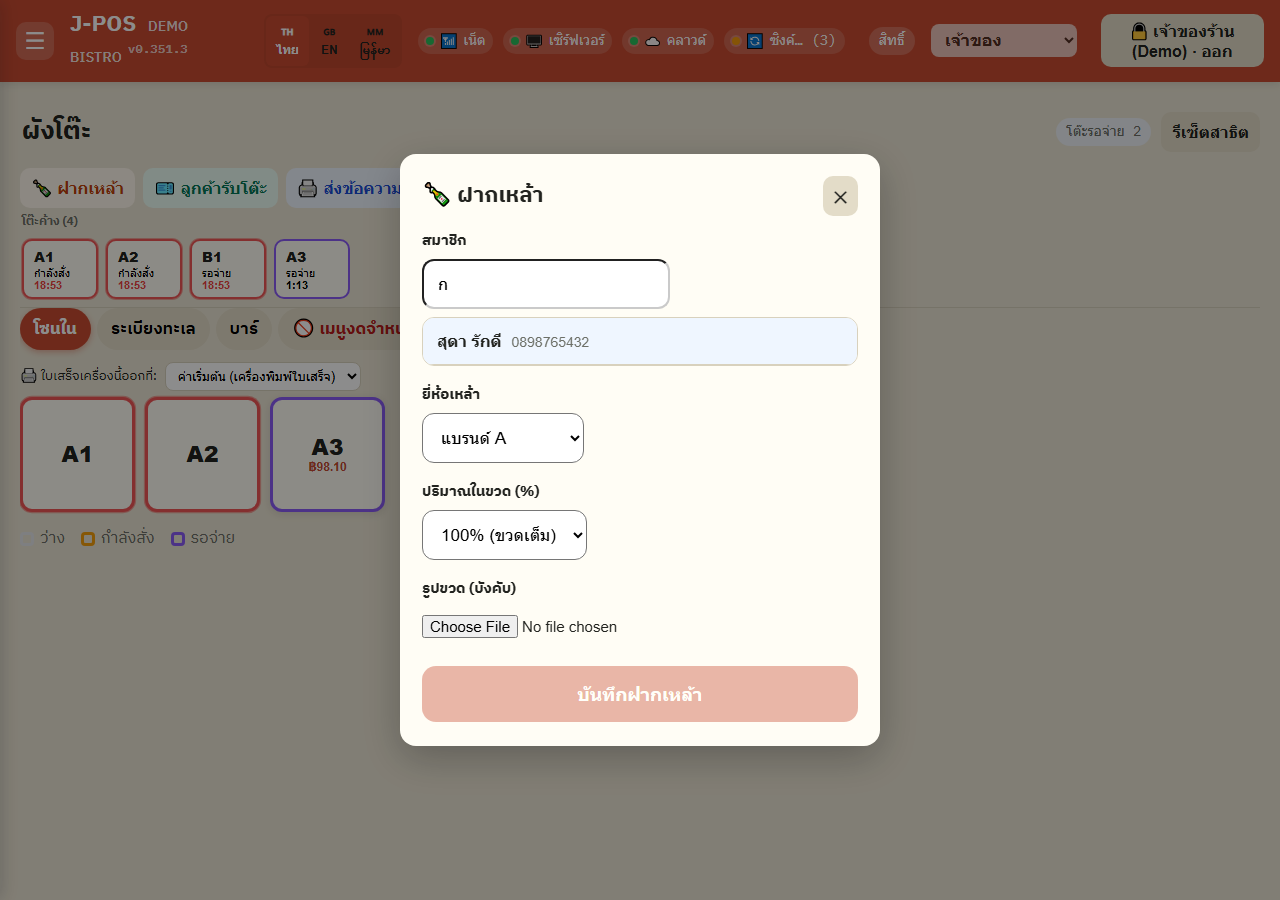
Open full size Choose how full the bottle is at deposit
Select the fill % at deposit (100% = a brand-new full bottle; adjustable in 5% steps for a bottle the customer already opened elsewhere and is now depositing).
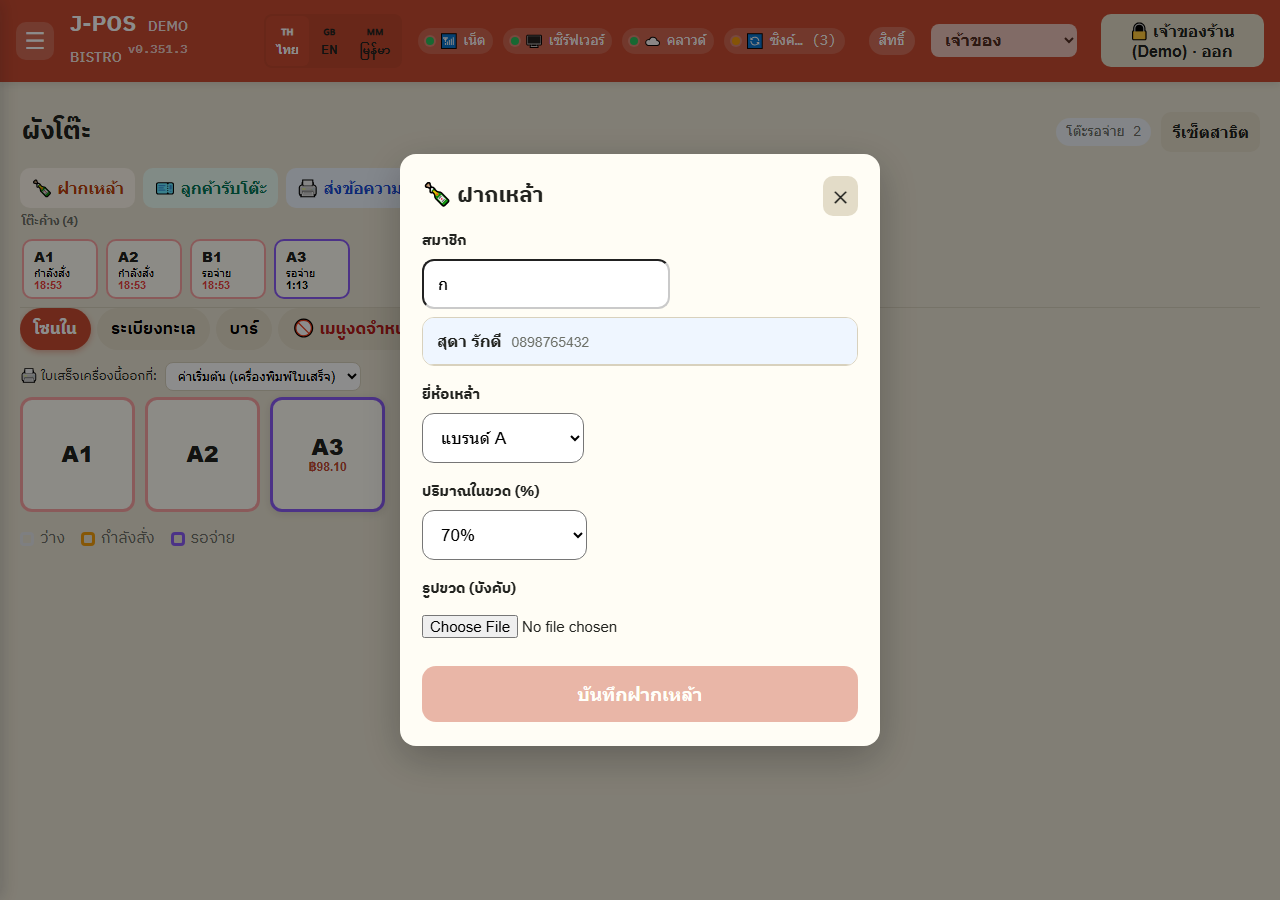
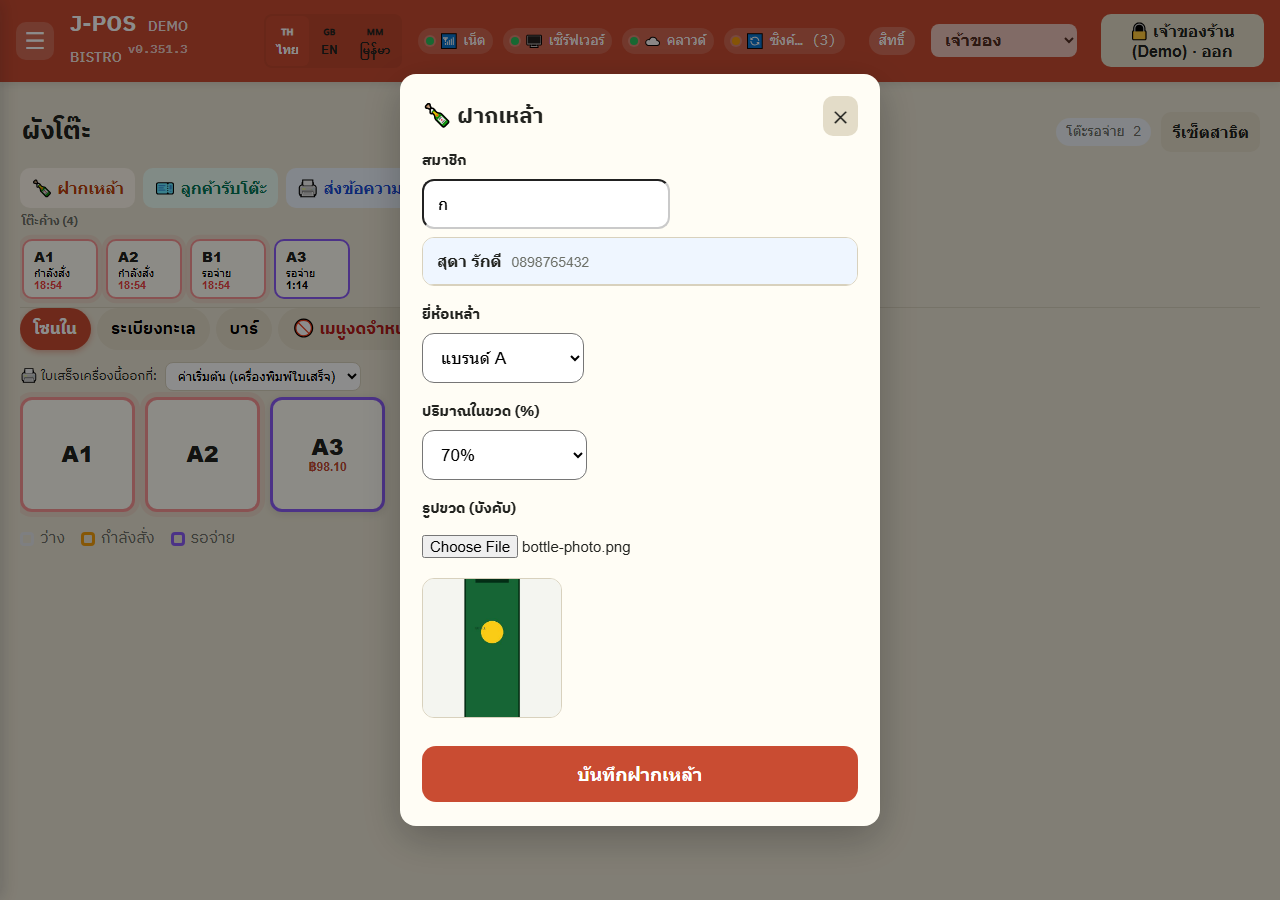
Open full size Take a photo (required), then save
A photo of the bottle is required before "Save bottle" becomes clickable — the button stays disabled until a member, a bottle name, and a photo are all present. The photo exists purely to identify the bottle on the shelf later, at withdrawal time.
Open full size View / print the deposit slip
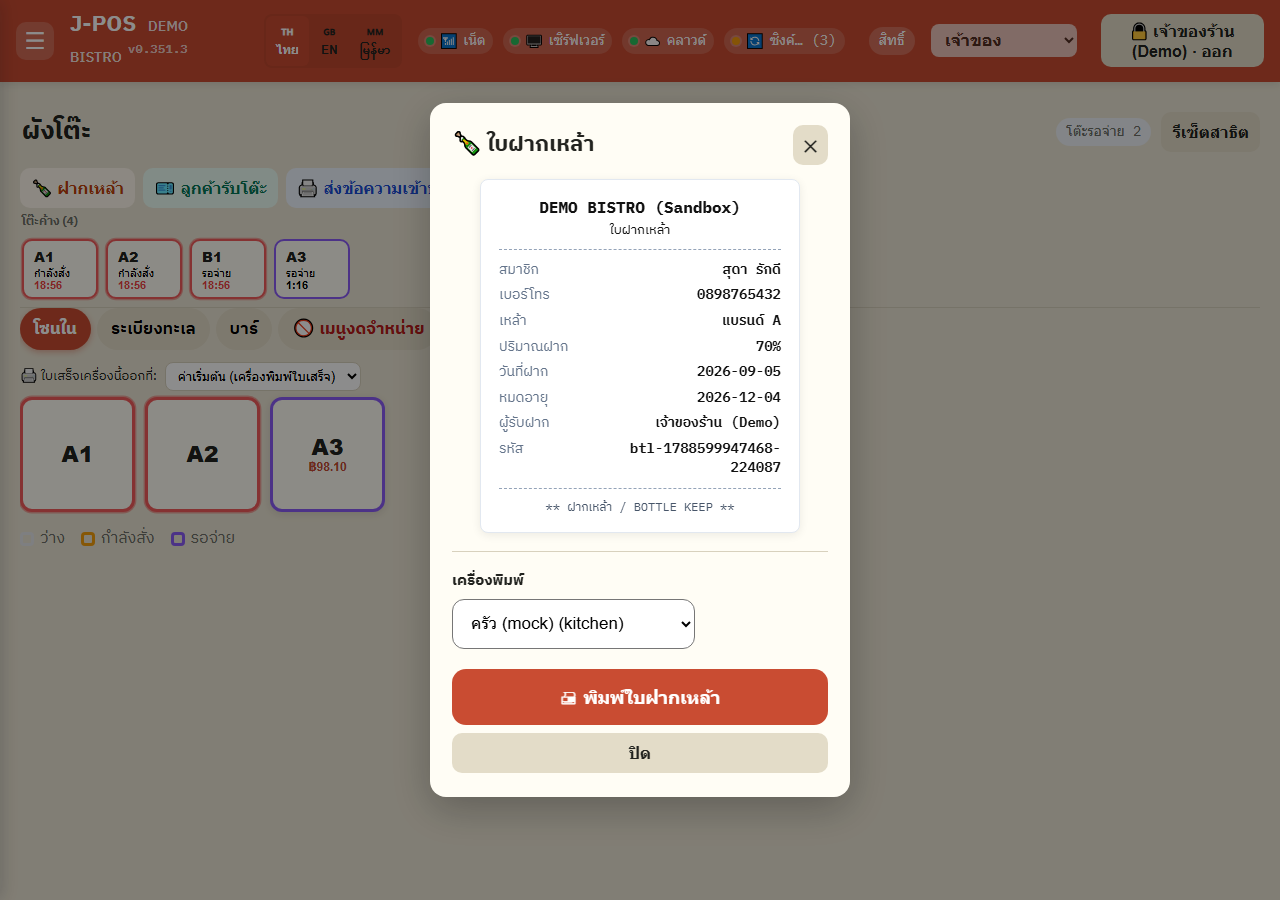
Once saved, a deposit-slip preview opens right away (shop name / member / drink / deposit date / expiry date). Pick a printer and print it for the customer to keep as proof.
Open full size
Whole-shop bottle overview ("Bottle keep" menu)
Open "Bottle keep (overview)"
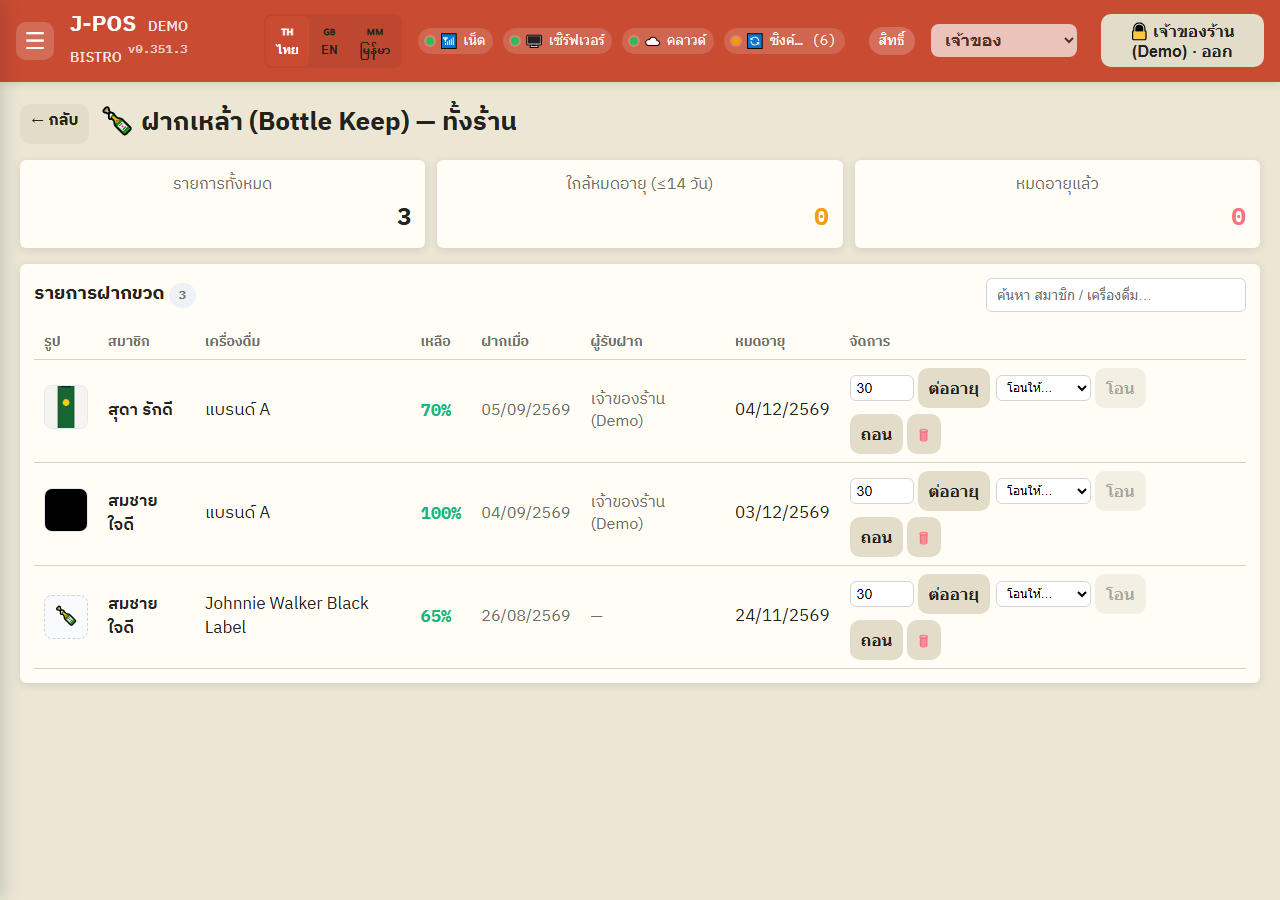
The summary cards at the top show 3 shop-wide numbers: total bottles, expiring soon (within 14 days), and already expired — these 3 cards are always the whole-shop total and never change with the search box below.
Open full size Search the list
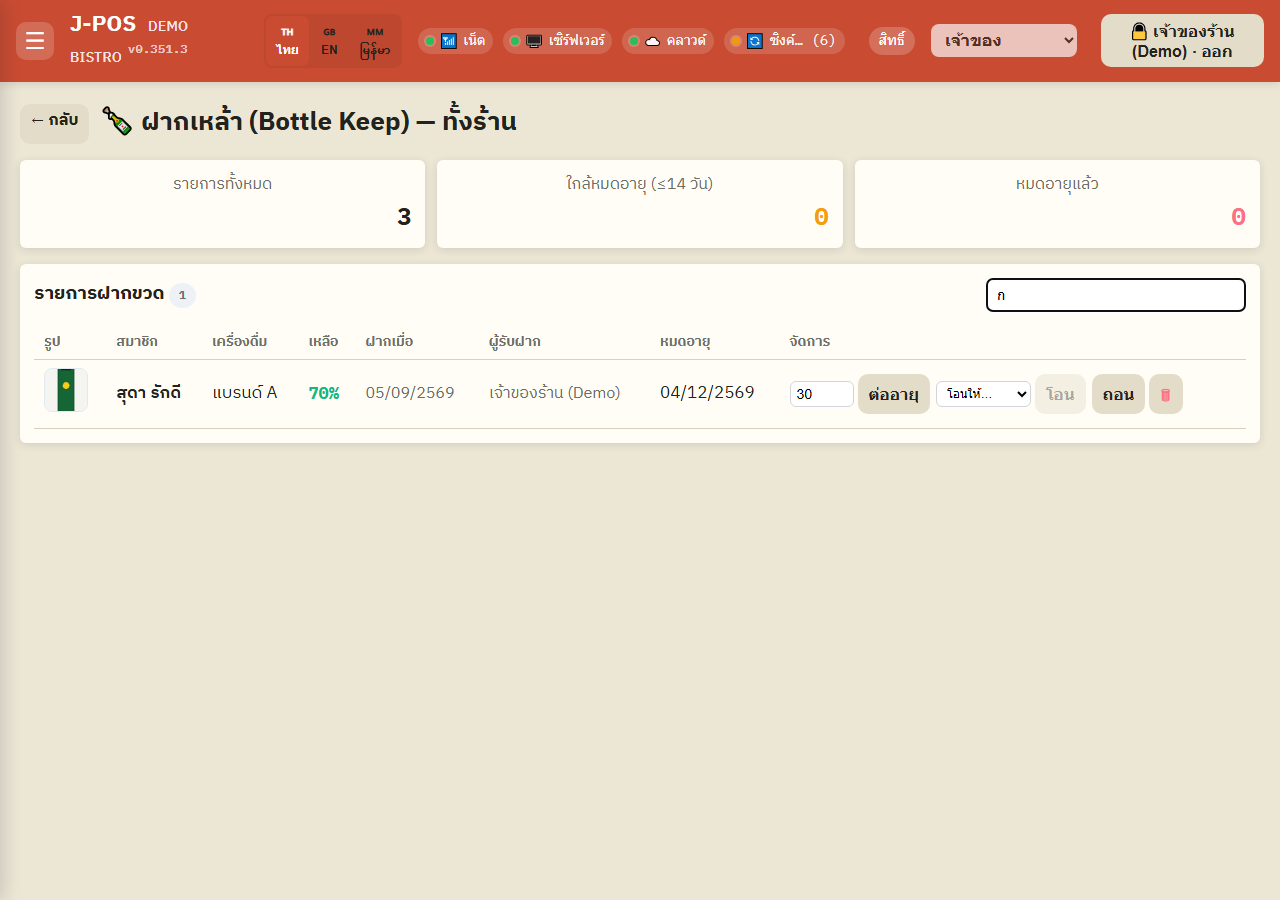
Type a member name or drink name in the search box; the table below filters accordingly and paginates once there are more than 10 matching rows.
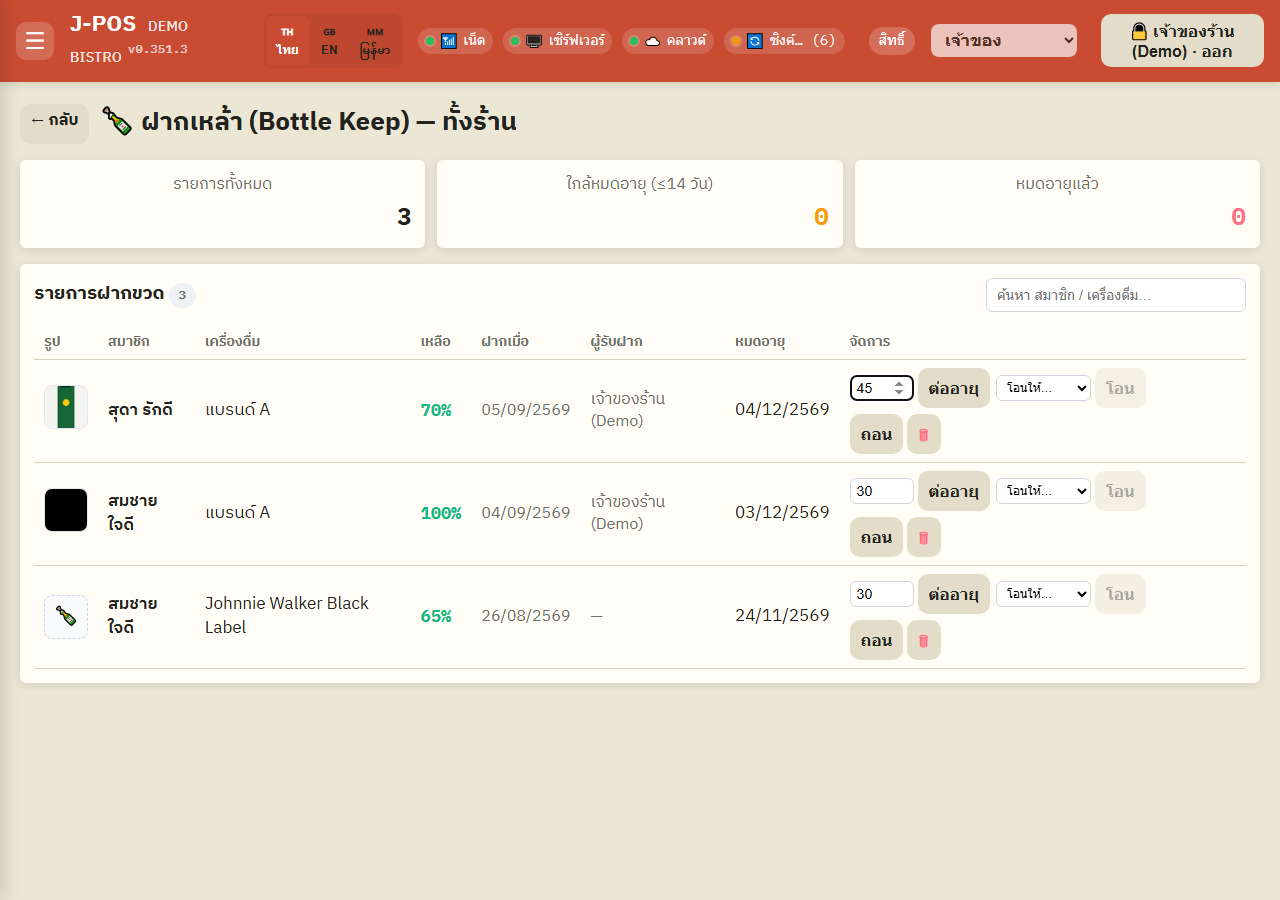
Open full size Extend a bottle's expiry
Enter the number of days to add next to the "Extend" button, then press it — the new expiry is always counted from that bottle's CURRENT (stored) expiry date, never from today. So if a bottle has been expired for a long time, a single extend may not be enough to push the new expiry past today (enter a large enough day count, or press "Extend" more than once) — it only falls back to counting from today in the rare case where the bottle has no expiry date on record at all (old migrated data with a blank expiry).
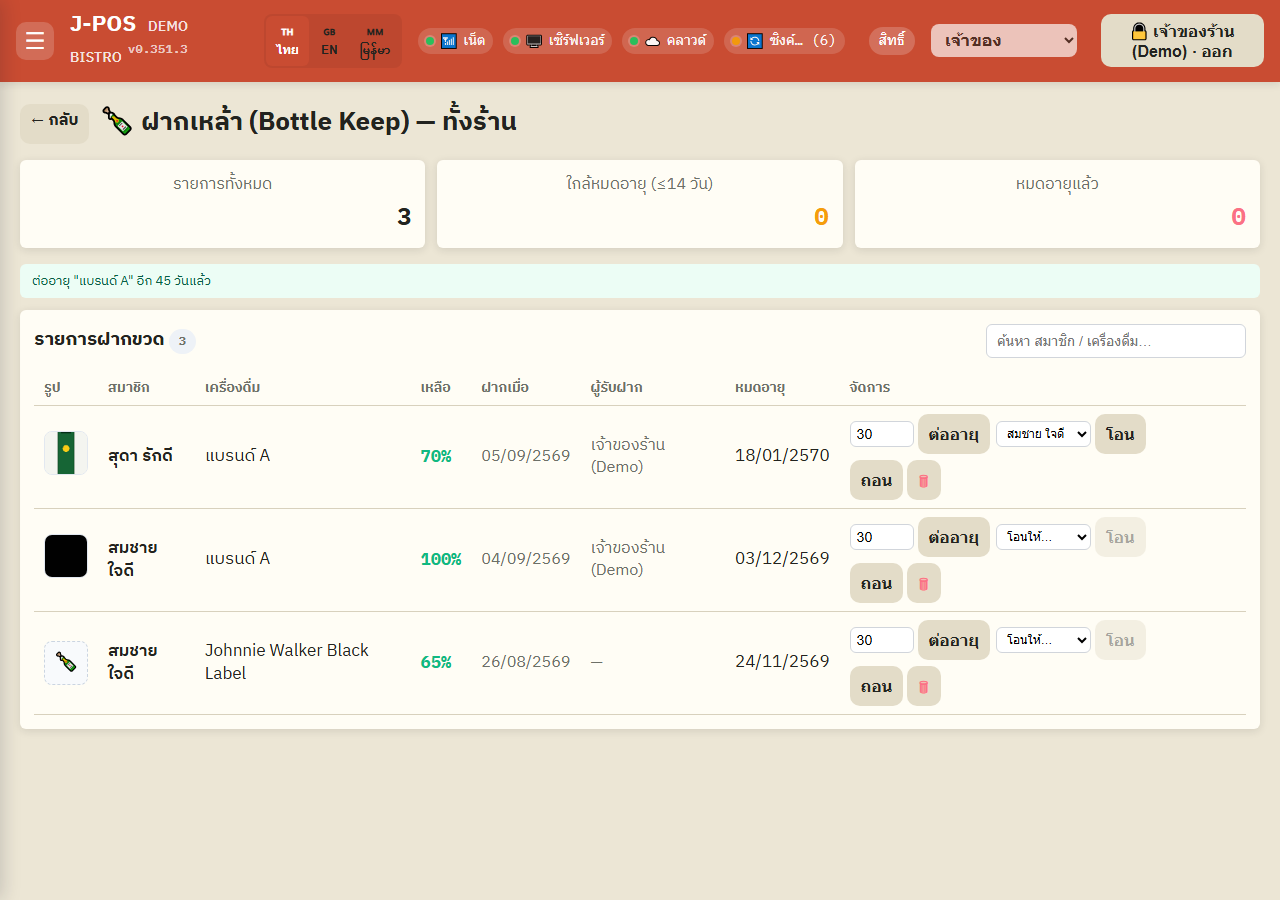
Open full size Transfer a bottle to another member
Pick a destination member from the "Transfer to…" dropdown and press "Transfer" — used when a customer wants to give a bottle to a friend, or staff typed the wrong member at deposit time.
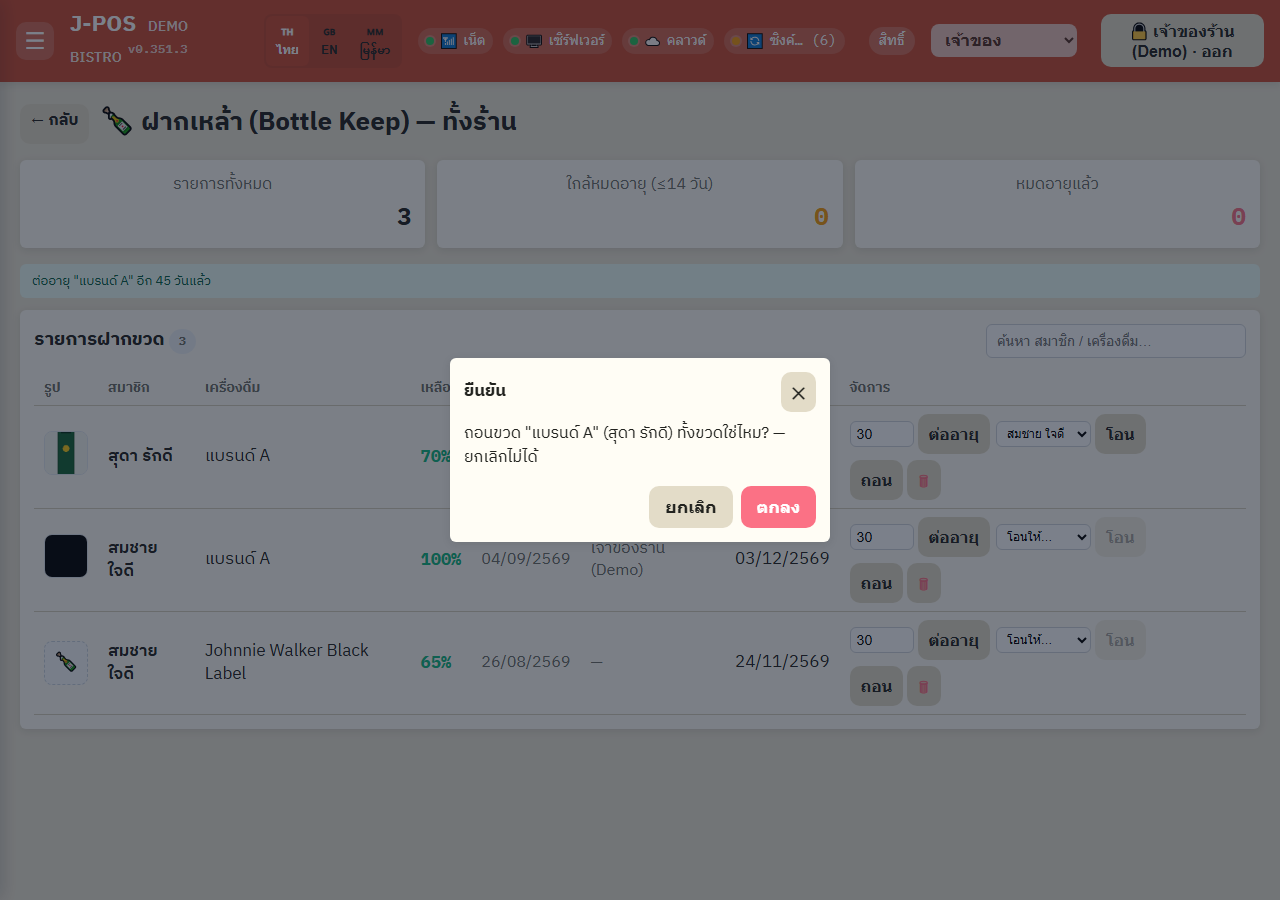
Open full size Withdraw the whole bottle (staff can do this directly, no OTP needed)
Press "Withdraw" and confirm — this withdraws the ENTIRE bottle in one action; there is no partial withdrawal from this page, and it can't be undone once confirmed.
This button does NOT require the customer's OTP code — any staff/admin with access to this page can withdraw any member's bottle directly. This is a separate path from the customer self-service OTP flow at the order screen.
Withdrawal is blocked if the bottle has already expired — extend it first so the new expiry is past today before it can be withdrawn.
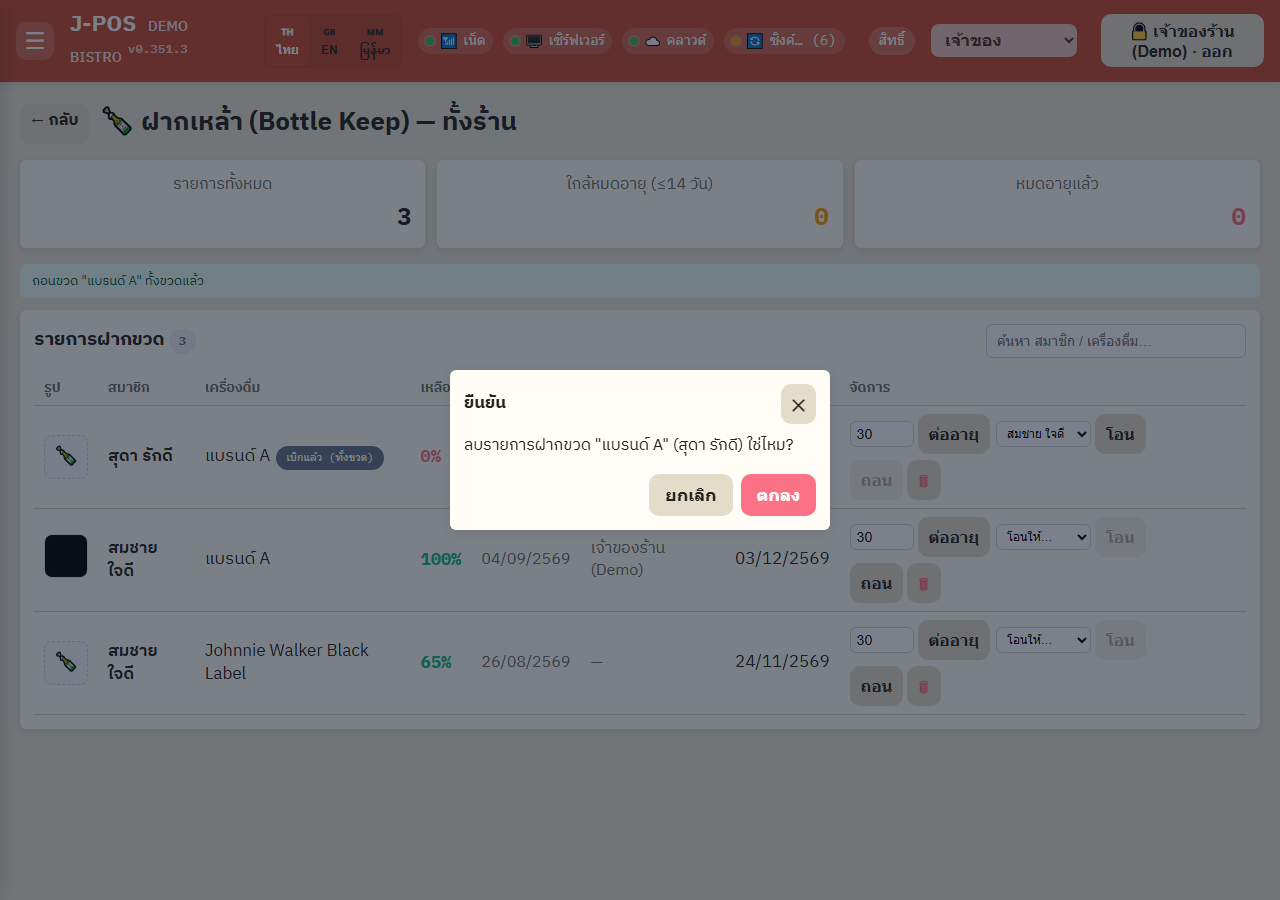
Open full size Delete a bottle-keep record
Press 🗑 and confirm — this permanently deletes the record from the system (unlike "Withdraw", which keeps a "withdrawn" history row in the table). Use this only for a genuine data-entry mistake you want gone entirely — it is not the button for reporting a lost bottle.
Open full size
Customer side — viewing your own bottles and requesting a withdrawal code
Open the "Bottle Keep" menu on the customer home screen
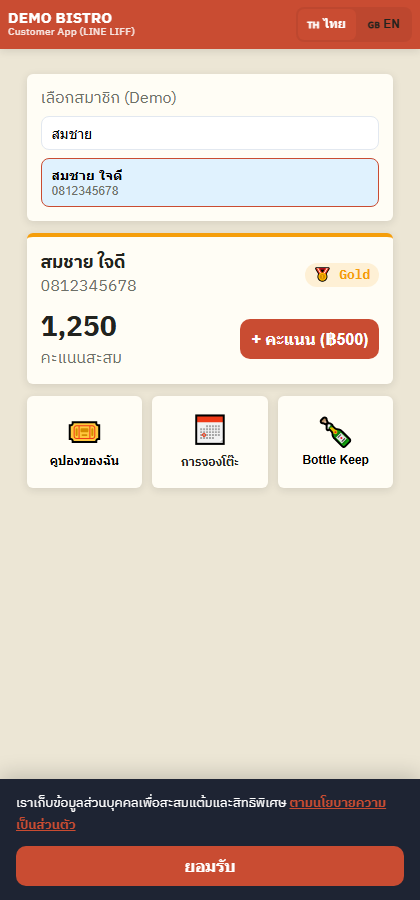
On the customer LINE home screen, tap the "Bottle Keep" icon to view your deposited bottles — you must be logged in with LINE first to see the list.
Open full size View each bottle's fill %, deposit date, and expiry date
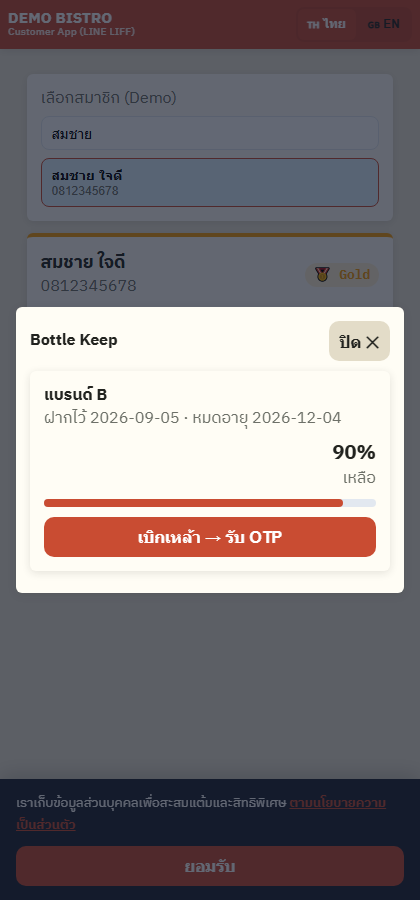
Each bottle shows its photo (if any), drink name, deposit date, expiry date, and a fill-% progress bar — this is view-only; a customer cannot edit or deposit a new bottle from this page, only staff at the register can do that.
A bottle that has already been withdrawn disappears from this list immediately — it is not shown as history to the customer (the shop's admin overview still shows it as usual).
Open full size Press "Withdraw bottle → Get OTP" and tell staff the code
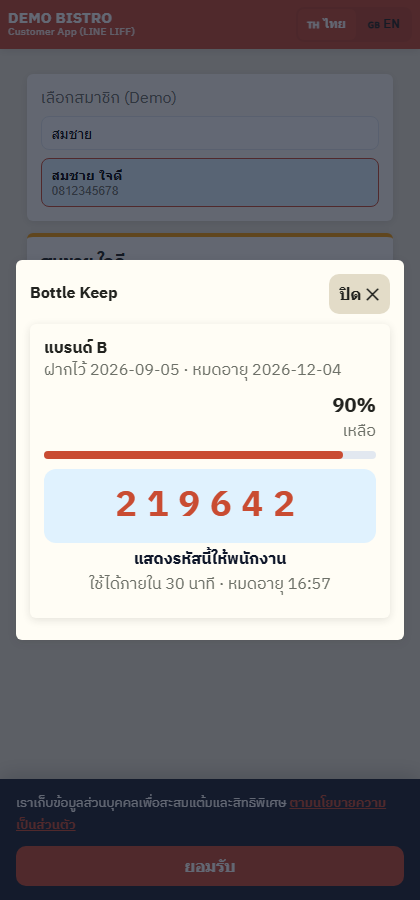
Press the button under the bottle to withdraw. A 6-digit code is generated immediately, valid for 30 minutes — give this code to staff at the register so they can withdraw the bottle for you.
You can't get a code for a bottle that has already been withdrawn, or has already expired (ask staff to extend it first).
Open full size
Staff redeeming a customer's OTP to withdraw a bottle
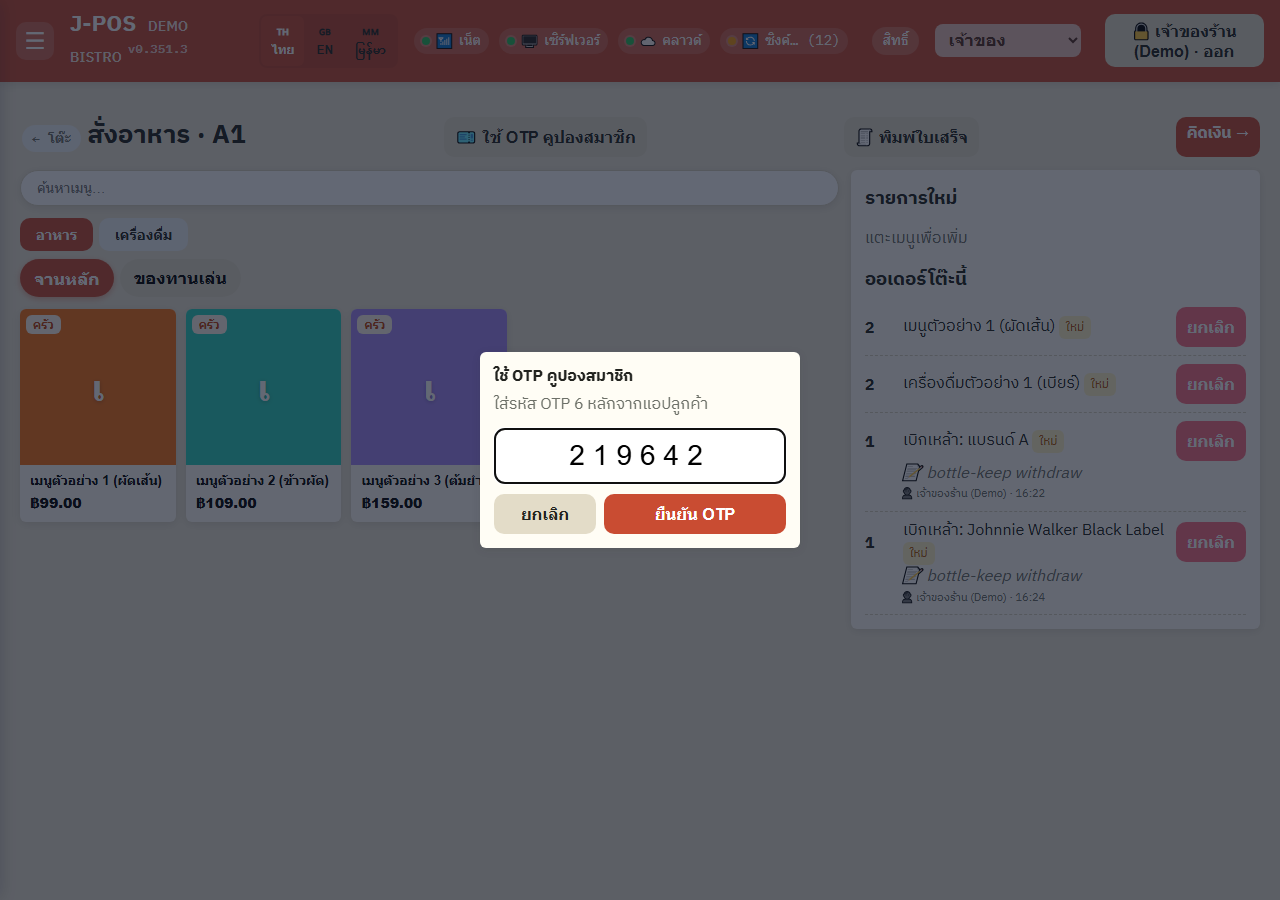
Open the order screen, press "🎫 Redeem member OTP"
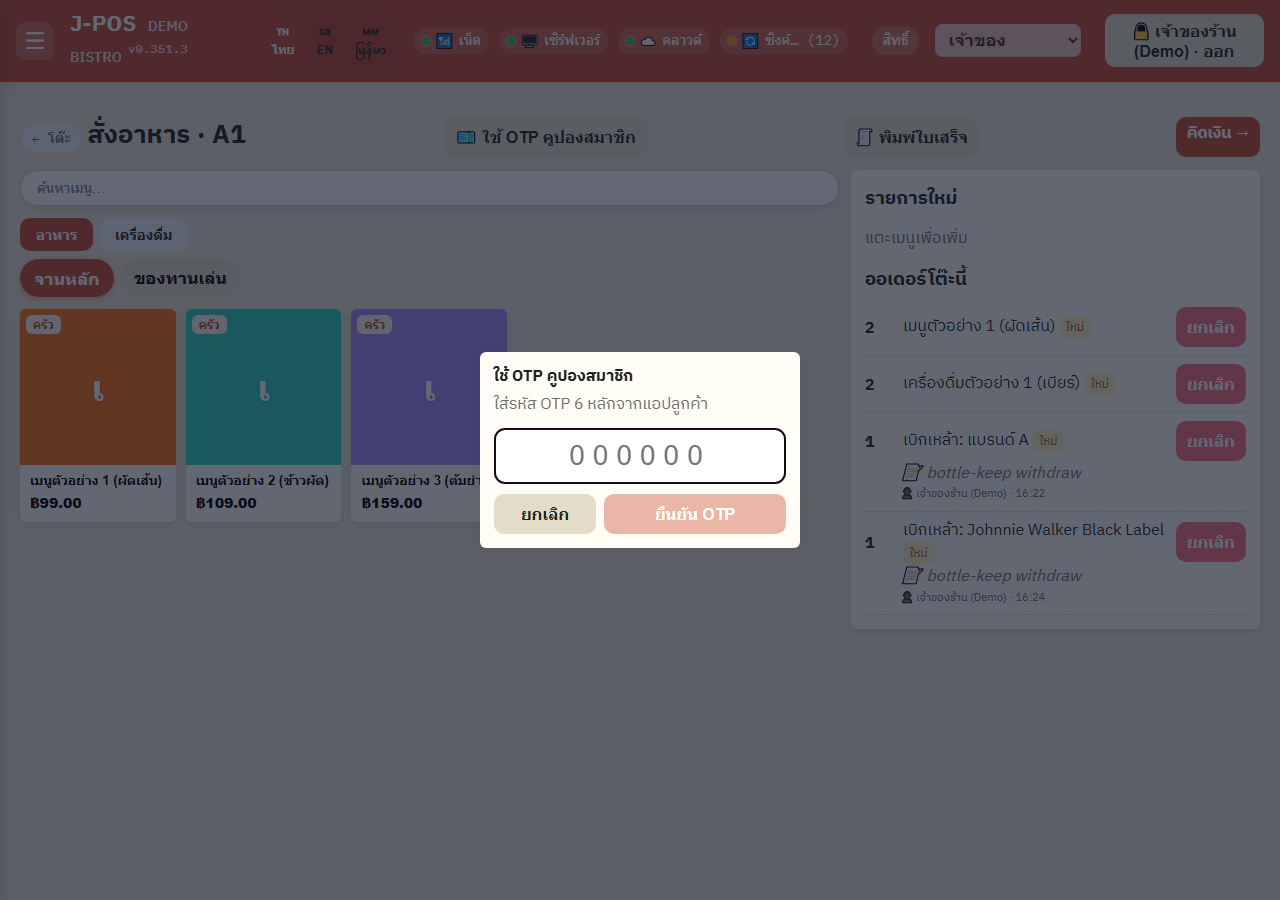
On a table's order screen (even before a bill is open), press "Redeem member OTP" in the top-right corner — the same button is used both for redeeming a coupon code and for a kept-bottle withdrawal code.
Open full size Enter the customer's 6-digit code → press "Confirm OTP"
Enter the code the customer showed you and press "Confirm OTP" — the system immediately marks that bottle as "withdrawn" (cannot be undone) and automatically adds a 0-baht "Withdrew bottle: <drink name>" line to that table's order, so there is a trace on the bill.
If the code belongs to a different member, the system rejects it and does not withdraw any bottle — a code is only valid for its actual owner.
Open full size
Bottle-keep settings (brands / deposit duration / expiry notifications)
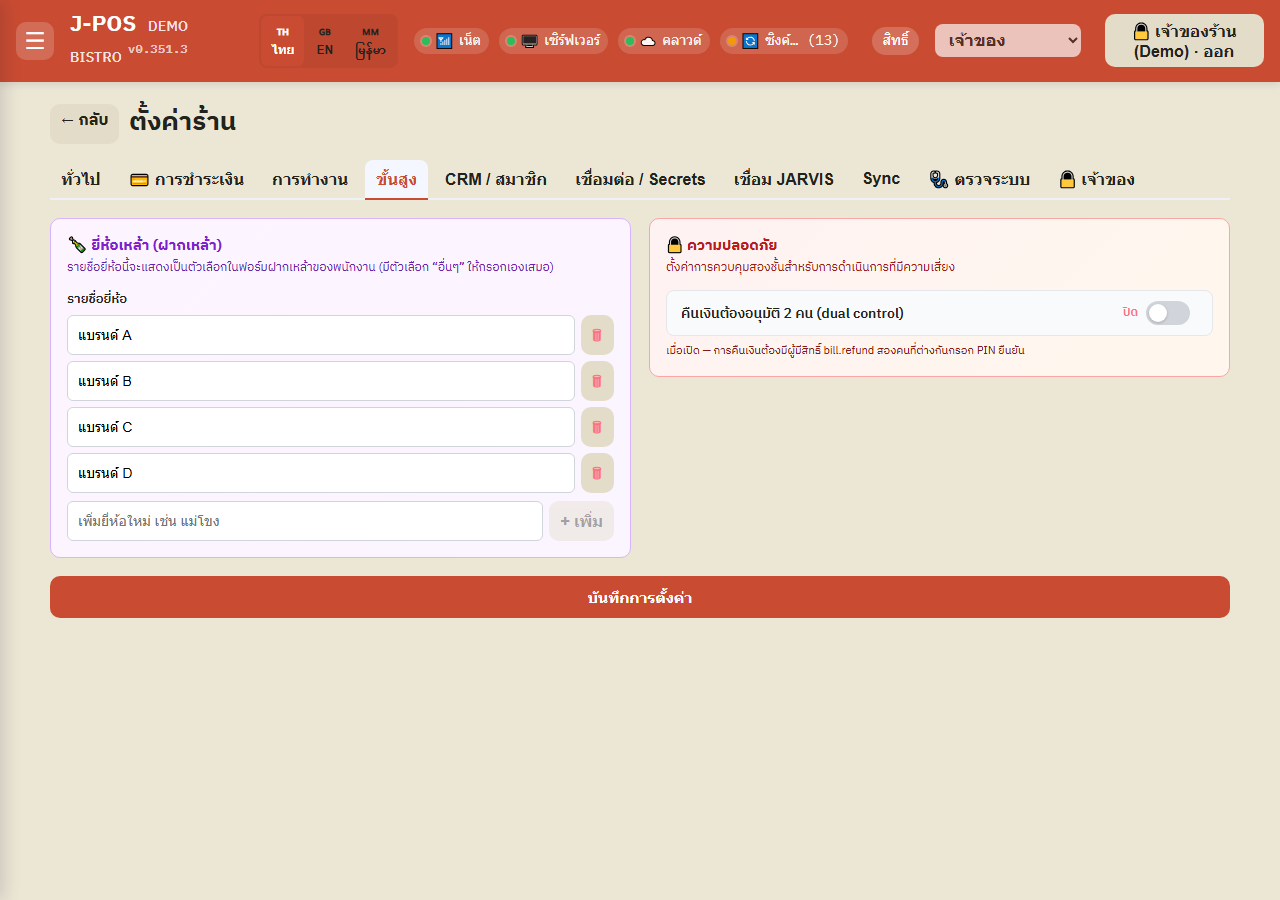
Set the list of selectable liquor brands
The Settings page's Advanced tab has a "Liquor brands (bottle-keep)" card for adding/removing brands that appear as options at deposit time — a duplicate name (case-insensitive) can't be added twice.
Open full size Set the default expiry duration + turn on LINE notifications
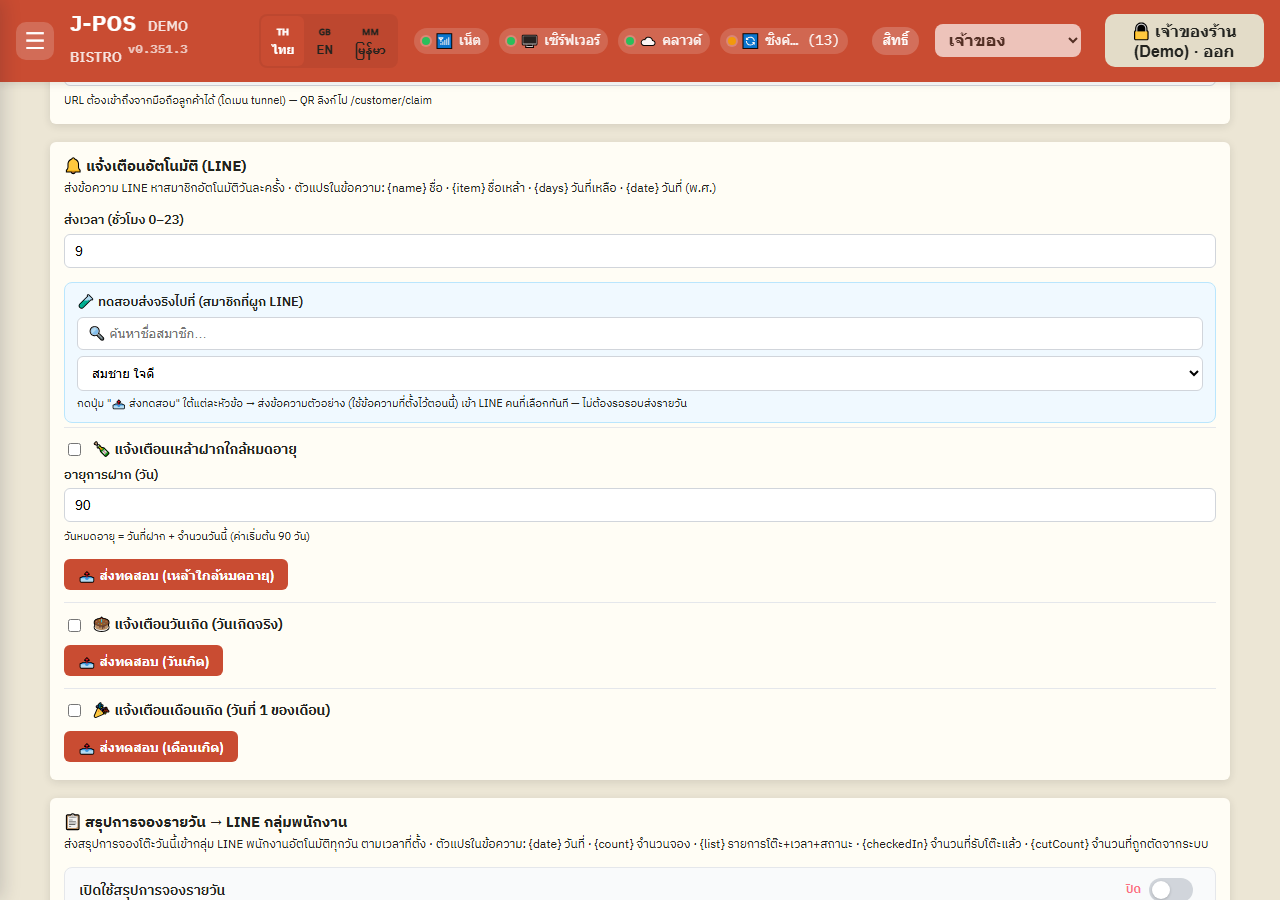
On the Settings page's "CRM / Members" tab, set the "number of days" used to calculate a new bottle's expiry (default 90 days from deposit) — changing this only affects bottles deposited AFTER the change; it never retroactively changes bottles already on deposit.
Turn on "Bottle-keep expiry reminder" so the system automatically sends a LINE message to members once a day when a bottle's remaining days fall within the configured window — this only reaches members who have already logged in with LINE at the shop at least once. A "send test" button lets you fire a real message to a chosen member right away before turning it on for real.
Open full size
Common points of confusion
An expired bottle can't be withdrawn either way — it must be extended first
Both a staff withdrawal from the admin overview and a customer's self-service OTP request are rejected immediately if the bottle has already expired (compared date-to-date, not by the hour). Staff must press "Extend" on the overview page to push the new expiry date past today before either path works again.
Depositing the same brand name again is allowed, but never merged into one row
The same member can deposit the same liquor brand multiple times — each deposit is its own separate row with its own deposit date, expiry date, fill %, and photo. Nothing is ever auto-merged or summed across rows.
Staff can withdraw ANY member's bottle from the admin overview, with no OTP from the owner
Withdrawing from the "Bottle keep (overview)" menu is a direct staff/admin action — it never checks or requires the bottle owner's identity or consent. This differs from the customer's own OTP flow through LINE, where the code is tied to that specific owning member. Correctness of an admin-side withdrawal therefore relies entirely on staff judgment at the counter.
There is no dedicated "lost bottle" status — only "Withdraw" or "Delete"
The system only has 2 statuses: on deposit (active) and withdrawn. There is no dedicated status for a broken, lost, or damaged bottle. If a bottle is genuinely lost or broken, the closest options are: "Delete" on the overview page (permanent, no history kept), or "Withdraw" if you want a history trail showing this bottle is "done" (it stays visible as a withdrawn row). Neither path has a reason/notes field built in — record the actual reason outside the system (a notebook or staff chat) if needed.
Withdrawal is always the whole bottle — there is no partial withdrawal anymore
Both an admin-side withdrawal and a customer's OTP withdrawal always take the ENTIRE bottle in one action (remaining % immediately becomes 0%) — there is no longer any field to withdraw only some percentage and leave the rest on deposit.
The bottle's photo is deleted the moment it's withdrawn
The photo taken at deposit exists only to identify the bottle on the shelf before withdrawal — as soon as it's withdrawn (either path), the system deletes the stored photo to save storage space. A "withdrawn" row in the history table no longer has any photo to show.